
Page 80 - CLINICAL PRACTICE II
P. 80
CikguOnline
CikguOnline
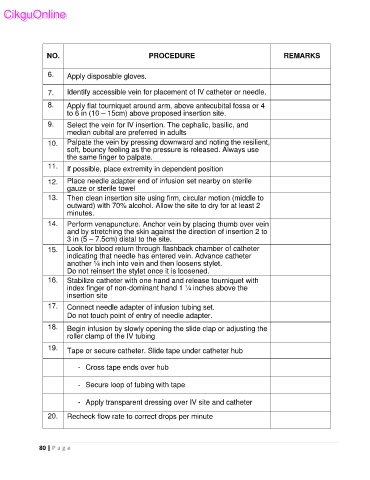
NO. PROCEDURE REMARKS
6. Apply disposable gloves.
7. Identify accessible vein for placement of IV catheter or needle.
8. Apply flat tourniquet around arm, above antecubital fossa or 4
to 6 in (10 – 15cm) above proposed insertion site.
9. Select the vein for IV insertion. The cephalic, basilic, and
median cubital are preferred in adults
10. Palpate the vein by pressing downward and noting the resilient,
soft, bouncy feeling as the pressure is released. Always use
the same finger to palpate.
11. If possible, place extremity in dependent position
12. Place needle adapter end of infusion set nearby on sterile
gauze or sterile towel
13. Then clean insertion site using firm, circular motion (middle to
outward) with 70% alcohol. Allow the site to dry for at least 2
minutes.
14. Perform venapuncture. Anchor vein by placing thumb over vein
and by stretching the skin against the direction of insertion 2 to
3 in (5 – 7.5cm) distal to the site.
15. Look for blood return through flashback chamber of catheter
indicating that needle has entered vein. Advance catheter
another ¼ inch into vein and then loosens stylet.
Do not reinsert the stylet once it is loosened.
16. Stabilize catheter with one hand and release tourniquet with
index finger of non-dominant hand 1 ¼ inches above the
insertion site
17. Connect needle adapter of infusion tubing set.
Do not touch point of entry of needle adapter.
18. Begin infusion by slowly opening the slide clap or adjusting the
roller clamp of the IV tubing
19. Tape or secure catheter. Slide tape under catheter hub
- Cross tape ends over hub
- Secure loop of tubing with tape
- Apply transparent dressing over IV site and catheter
20. Recheck flow rate to correct drops per minute
80 | P a g e