
Page 7 - 5.6 Safe Patient Handling Procedure Fowler’s Positioning
P. 7
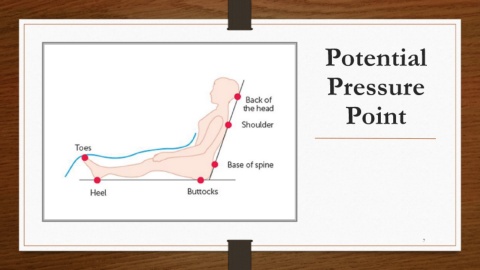
Potential


                                                                                                                                    Pressure


                                                                                                                                           Point


                                                                                                                                                                          7