
Page 57 - Tamiya Model Magazine - Issue 292 (February 2020)
P. 57
Model, from a prototype
sent directly from Dream
Model factory in Shanghai.
Intake and landing gear
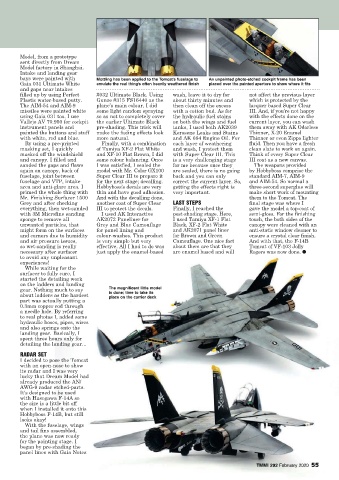
bays were painted with Mottling has been applied to the Tomcat's fuselage to An unpainted photo-etched cockpit frame has been
Gaia 031 Ultimate White emulate the real thing's often heavily weathered finish placed over the painted aperture to show where it fits
and gaps near intakes
filled up by using Perfect #032 Ultimate Black. Using wash, leave it to dry for not affect the previous layer
Plastic water-based putty. Gunze #315 FS16440 as the about thirty minutes and which is protected by the
The AIM-54 and AIM-9 plane’s main colour, I did then clean off the excess lacquer based Super Clear
missiles were painted white some light random spraying with a cotton bud. As for III. And, if you’re not happy
using Gaia 031 too. I use so as not to completely cover the hydraulic fuel stains with the effects done on the
Vallejo AV 70.950 for cockpit the earlier Ultimate Black on both the wings and fuel current layer, you can wash
instrument panels and pre-shading. This trick will tanks, I used both AK2039 them away with AK Odorless
painted the buttons and stuff make the fading effects look Kerosene Leaks and Stains Thinner, X-20 Enamel
with white, red and blue. more natural. and AK 084 Engine Oil. For Thinner or even Zippo lighter
By using a pre-printed Finally, with a combination each layer of weathering fluid. Then you have a fresh
masking set, I quickly of Tamiya XF-2 Flat White and wash, I protect them clean slate to work on again.
masked off the windshield and XF-10 Flat Brown, I did with Super Clear III. This Think of every Super Clear
and canopy. I filled and some colour balancing. Once is a very challenging stage III coat as a new canvas.
sanded the gaps and flaws I was satisfied, I sealed the for me because once they The weapons provided
again on canopy, back of model with Mr. Color GX100 are sealed, there is no going by Hobbyboss comprise the
fuselage, joint between Super Clear III to prepare it back and you can only standard AIM-7, AIM-9
fuselage and VTP, intake for the next stage; decalling. correct the current layer. So, and AIM-54. So normal a
area and anti-glare area. I Hobbyboss’s decals are very getting the effects right is three-second superglue will
primed the whole thing with thin and have good adhesion. very important. make short work of mounting
Mr. Finishing Surfacer 1500 And with the decalling done, them to the Tomcat. The
Grey and after checking another coat of Super Clear LAST STEPS final stage was where I
everything, then wet-sanded III to protect the decals. Finally, I reached the gave the model a top-coat of
with 3M Microfine sanding I used AK Interactive post-shading stage. Here, semi-gloss. For the finishing
sponge to remove all AK2072 Paneliner for I used Tamiya XF-1 Flat touch, the both sides of the
unwanted particles, that Grey and Blue Camouflage Black, XF-2 Flat White canopy were cleaned with an
might form on the surfaces for panel lining and and AK2071 panel liner anti-static window cleaner to
and corners due to humidity colour-washes. This product for Brown and Green ensure a crystal clear finish.
and air pressure issues, is very simple but very Camouflage. One nice fact And with that, the F-14B
so wet-sanding is really effective. All I had to do was about them are that they Tomcat of VF-103 Jolly
necessary after surfacer just apply the enamel-based are enamel based and will Rogers was now done. ●
to avoid any unpleasant
experiences!
While waiting for the
surfacer to fully cure, I
started the detailing work
on the ladders and landing
gear. Nothing much to say The magnificent little model
is done; time to take its
about ladders as the hardest place on the carrier deck
part was actually putting a
0.3mm copper rod through
a needle hole. By referring
to real photos I, added some
hydraulic hoses, pipes, wires
and also springs onto the
landing gear. Basically, I
spent three hours only for
detailing the landing gear...
RADAR SET
I decided to pose the Tomcat
with an open-nose to show
its radar and I was very
lucky that Dream Model had
already produced the AN/
AWG-9 radar etched-parts.
It's designed to be used
with Hasegawa F-14A so
the size is a little bit off
when I installed it onto this
Hobbyboss F-14B, but still
looks okay!
With the fuselage, wings
and tail fins assembled,
the plane was now ready
for the painting stage. I
began by pre-shading the
panel lines with Gaia Notes
TMMI 292 February 2020
TMMI 292 February 2020 55