
Page 55 - Golf World (February 2020)
P. 55
slice
buster
special
by golf world
teaching panelliSt
luther blacklock
#1
fix your
grip
4 steps to forming
the perfect grip
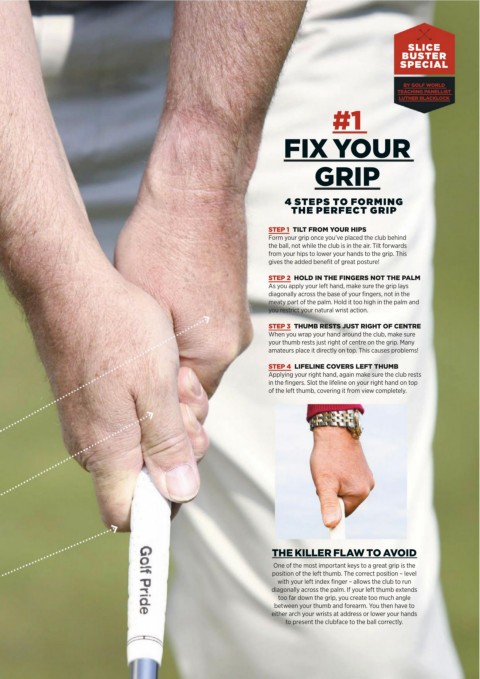
Step 1 tilt from your hipS
Form your grip once you’ve placed the club behind
the ball, not while the club is in the air. Tilt forwards
from your hips to lower your hands to the grip. This
gives the added benefit of great posture!
Step 2 hold in the fingerS not the palm
As you apply your left hand, make sure the grip lays
diagonally across the base of your fingers, not in the
meaty part of the palm. Hold it too high in the palm and
you restrict your natural wrist action.
Step 3 thumb reStS juSt right of centre
When you wrap your hand around the club, make sure
your thumb rests just right of centre on the grip. Many
amateurs place it directly on top. This causes problems!
Step 4 lifeline coverS left thumb
Applying your right hand, again make sure the club rests
in the fingers. Slot the lifeline on your right hand on top
of the left thumb, covering it from view completely.
the killer flaw to avoid
One of the most important keys to a great grip is the
position of the left thumb. The correct position – level
with your left index finger – allows the club to run
diagonally across the palm. If your left thumb extends
too far down the grip, you create too much angle
between your thumb and forearm. You then have to
either arch your wrists at address or lower your hands
to present the clubface to the ball correctly.