
Page 95 - 100% Biker (January 2020)
P. 95
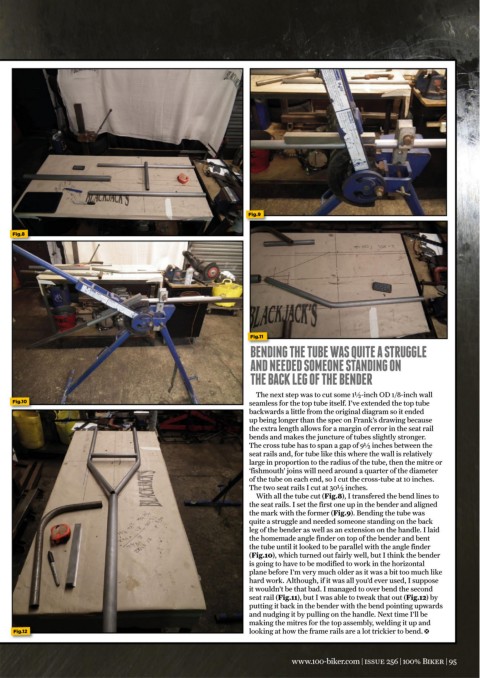
Fig.9


     Fig.8


                                                                                      Fig.11
                                                                                      BENDING THE TUBE WAS QUITE A STRUGGLE

                                                                                      AND NEEDED SOMEONE STANDING ON

                                                                                      THE BACK LEG OF THE BENDER


                                                                                        The next step was to cut some 1½-inch OD 1/8-inch wall
     Fig.10                                                                          seamless for the top tube itself. I’ve extended the top tube
                                                                                     backwards a little from the original diagram so it ended
                                                                                     up being longer than the spec on Frank’s drawing because
                                                                                     the extra length allows for a margin of error in the seat rail
                                                                                     bends and makes the juncture of tubes slightly stronger.
                                                                                     The cross tube has to span a gap of 9½ inches between the
                                                                                     seat rails and, for tube like this where the wall is relatively
                                                                                     large in proportion to the radius of the tube, then the mitre or
                                                                                     ‘fishmouth’ joins will need around a quarter of the diameter
                                                                                     of the tube on each end, so I cut the cross-tube at 10 inches.
                                                                                     The two seat rails I cut at 30½ inches.
                                                                                        With all the tube cut (Fig.8), I transfered the bend lines to
                                                                                     the seat rails. I set the first one up in the bender and aligned
                                                                                     the mark with the former (Fig.9). Bending the tube was
                                                                                     quite a struggle and needed someone standing on the back
                                                                                     leg of the bender as well as an extension on the handle. I laid
                                                                                     the homemade angle finder on top of the bender and bent
                                                                                     the tube until it looked to be parallel with the angle finder
                                                                                     (Fig.10), which turned out fairly well, but I think the bender
                                                                                     is going to have to be modified to work in the horizontal
                                                                                     plane before I’m very much older as it was a bit too much like
                                                                                     hard work. Although, if it was all you’d ever used, I suppose
                                                                                     it wouldn’t be that bad. I managed to over bend the second
                                                                                     seat rail (Fig.11), but I was able to tweak that out (Fig.12) by
                                                                                     putting it back in the bender with the bend pointing upwards
                                                                                     and nudging it by pulling on the handle. Next time I’ll be
                                                                                     making the mitres for the top assembly, welding it up and
     Fig.12                                                                          looking at how the frame rails are a lot trickier to bend.  p


                                                                                                    www.100-biker.com | issue 256 | 100% Biker | 95