
Page 567 - Windows 10 May 2019 Update The Missing Manual: The Book That Should Have Been in the Box
P. 567
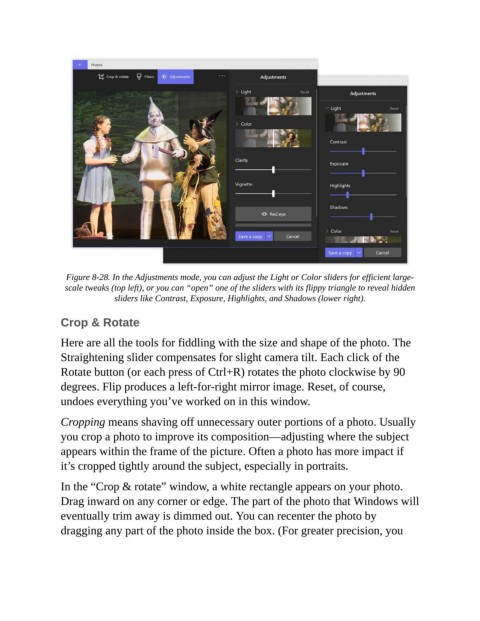
Figure 8-28. In the Adjustments mode, you can adjust the Light or Color sliders for efficient large-
                 scale tweaks (top left), or you can “open” one of the sliders with its flippy triangle to reveal hidden
                              sliders like Contrast, Exposure, Highlights, and Shadows (lower right).

                Crop & Rotate


                Here are all the tools for fiddling with the size and shape of the photo. The
                Straightening slider compensates for slight camera tilt. Each click of the
                Rotate button (or each press of Ctrl+R) rotates the photo clockwise by 90

                degrees. Flip produces a left-for-right mirror image. Reset, of course,
                undoes everything you’ve worked on in this window.

                Cropping means shaving off unnecessary outer portions of a photo. Usually
                you crop a photo to improve its composition—adjusting where the subject

                appears within the frame of the picture. Often a photo has more impact if
                it’s cropped tightly around the subject, especially in portraits.

                In the “Crop & rotate” window, a white rectangle appears on your photo.

                Drag inward on any corner or edge. The part of the photo that Windows will
                eventually trim away is dimmed out. You can recenter the photo by

                dragging any part of the photo inside the box. (For greater precision, you