
Page 44 - ClayCraft - Issue 35 (January 2020)
P. 44
SKILL SCHOOL
SKILL SCHOOL
PROJECT
THREE
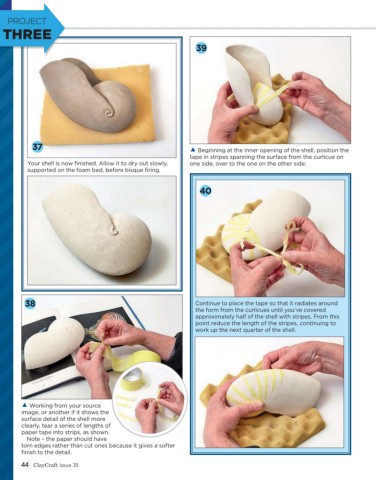
39
37 Beginning at the inner opening of the shell, position the
tape in stripes spanning the surface from the curlicue on
Your shell is now finished. Allow it to dry out slowly, one side, over to the one on the other side.
supported on the foam bed, before bisque firing.
40
38 Continue to place the tape so that it radiates around
the form from the curlicues until you’ve covered
approximately half of the shell with stripes. From this
point reduce the length of the stripes, continuing to
work up the next quarter of the shell.
Working from your source
image, or another if it shows the
surface detail of the shell more
clearly, tear a series of lengths of
paper tape into strips, as shown.
Note – the paper should have
torn edges rather than cut ones because it gives a softer
finish to the detail.
44 ClayCraft Issue 35