
Page 12 - TCS ICT Book 5
P. 12
The City School 2021-2022
1. Media Library: this is where you will find all your media including video clips, photos,
and music. It also houses transitions, effects, and a variety of other assets that you can
use in your projects.
2. Preview Window: the preview window shows the video in the timeline. The position of
the playhead is shown in the time code in the lower right corner. You can enter a new
time code to jump to a specific point in the video. Below the time code, you’ll find the
snapshot button which can save a full-resolution still frame and automatically add it to
the Media Library as an image.
3. Toolbar: the toolbar provides easy access to many editing commands. You can zoom
in and out on the timeline and access a variety of tools like cut and speed.
4. Timeline: the timeline is where you assemble the media and effects for your video
project.
Saving a Project
Click File, File > Save Project - Save Project As,
or use the hotkey Ctrl+S. Your project will be
saved as a file with the extension: .wfp. These
files can only be recognized by Filmora9.
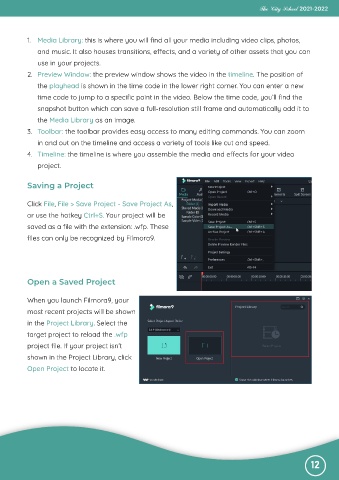
Open a Saved Project
When you launch Filmora9, your
most recent projects will be shown
in the Project Library. Select the
target project to reload the .wfp
project file. If your project isn’t
shown in the Project Library, click
Open Project to locate it.
12