
Page 34 - Making Cards & Papercraft (February 2020)
P. 34
USING COLOUR AND TEXTURE
Inspired by the season
Each issue one of our contributors is given the challenge of using a photo
representing that month to create a card using the textures, colours – whatever they
Designed by
Sue Hastead see! This issue Sue came up with this sweet Valentine’s card – see what you can use
for inspiration from your own photos!
What do I need? To create the bokeh look in the
3 background, place the point of the
White & Kraft card nib of the colourless blender pen onto Where can I buy it?
6x6 Perfect Moments paper pad by First Edition the coloured background; varying the Stamping Bella & MFT products available from
Extreme Black inkpad by MFT pressure and the amount of time you hold www.diestodiefor.com (020 8224 9101)
Potting Shed Archival inkpad the nib down will create circles of di erent Copic marker pens available from
Uptown Girls Snapshots I Heart You rubber www.cultpens.com (01884 259 856)
stamp, Ellie Loves Phant Stuffies rubber sizes and depths of colour. Paper pad & Archival ink available from
stamp & Snapshots Polaroid Cut It Out die www.crafterscompanion.co.uk
by Stamping Bella Die-cut a piece of Kraft card with the (01388 663251)
Selection of alcohol marker pens (Sue used 4 polaroid die. Stamp
Copics, see guide below) the sentiment on it in
Red sparkly ribbon Potting Shed ink and x to
Stardust Stickles by Ranger the coloured image.
Guide to using Copic marker pens: Cut an 11cm square
Cut an 11cm square
of patterned paper
Skin: E04, E11, E00, E000
Skin: 5 of patterned paper
Hair: E44, E43, E42, E59, E39, E44, YR21
Hair: and wrap red ribbon
three times around the
T-shirts: E84, E81, E43, R79, R89, R27
T-shirts: three times around the
centre of it, securing it at
Background:
Background: R12, E93 centre of it, securing it at
the back with tape. Fix
Colourless blender pen the back with tape. Fix
the coloured image to
the coloured image to
How do I make it? the centre with foam
pads. Layer this in the
pads. Layer this in the
centre of the card front
Create an 11.5cm square white card centre of the card front
1 blank. Cut heart patterned paper with foam pads.
from the paper pad the same size and x
to the card front. Dot some
6 Stickles around
Stamp the image in black ink on the image to add
2 white card, cut out and colour with to the illusion of
alcohol markers. sparkle and light.
R
B
E
U
Y
R
A
F FEBRUARY
i
r
p
n
s
a
i
o
w
n
t
h
o
t
p
o
s
i
o
a
t
s
e
h
d
i
n
g
i
w
m
a
t
o
k
a
e
t
e
t
h
t
r
w
o
u
e
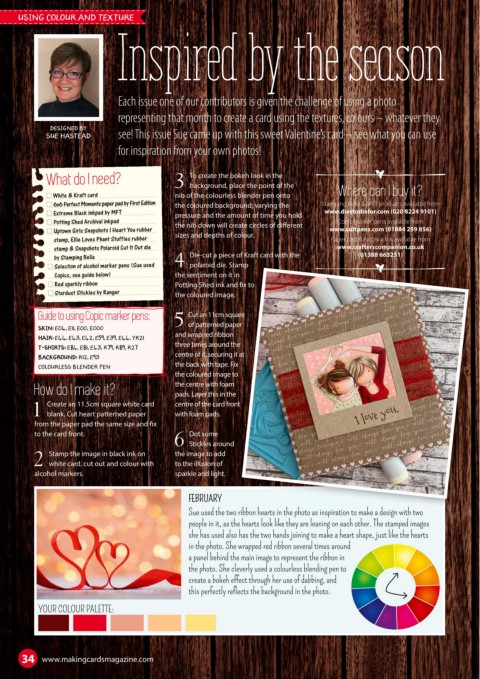
Sue used the two ribbon hearts in the photo as inspiration to make a design with two
S
e
d
u
s
i
t
s
n
h
e
t
r
b
o
b
i
n
e
a
h
people in it, as the hearts look like they are leaning on each other. The stamped images
she has used also has the two hands joining to make a heart shape, just like the hearts
in the photo. She wrapped red ribbon several times around
a panel behind the main image to represent the ribbon in
the photo. She cleverly used a colourless blending pen to
create a bokeh effect through her use of dabbing, and
this perfectly reflects the background in the photo.
YOUR COLOUR PALETTE:
34 www.makingcardsmagazine.com