
Page 55 - Making Cards & Papercraft (February 2020)
P. 55
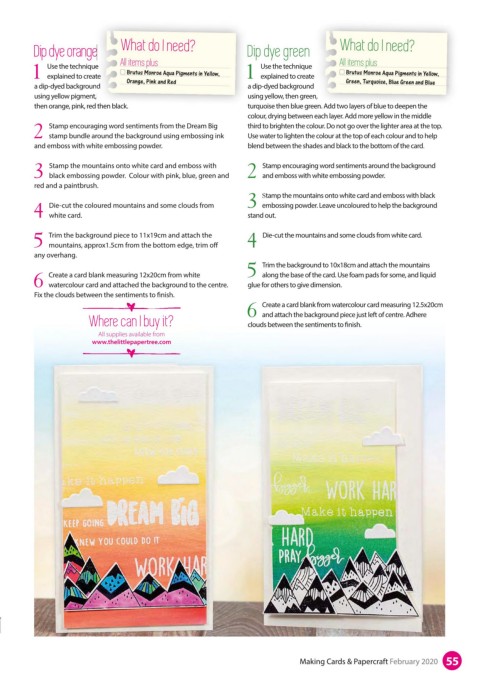
Dip dye orange
         D i p   d y e   o r a n g e  What do I need?         Dip dye green          What do I need?
                               All items plus                                        All items plus
             U s e   t h e   t e c h n i q u e                    Use the technique
             Use the technique
                                 Brutus Monroe Aqua Pigments in Yellow,                Brutus Monroe Aqua Pigments in Yellow,
             explained to create
         1 explained to create                                1 explained to create
                                 Orange, Pink and Red                                  Green, Turquoise, Blue Green and Blue
         a dip-dyed background
         a dip-dyed background                                a dip-dyed background
                                                              using yellow, then green,
         using yellow pigment,
         using yellow pigment,                                using yellow, then green,
                                                              turquoise then blue green. Add two layers of blue to deepen the
         then orange, pink, red then black.                   turquoise then blue green. Add two layers of blue to deepen the
         then orange, pink, red then black.
                                                              colour, drying between each layer. Add more yellow in the middle
             Stamp encouraging word sentiments from the Dream Big   third to brighten the colour. Do not go over the lighter area at the top.
         2 stamp bundle around the background using embossing ink   Use water to lighten the colour at the top of each colour and to help
         and emboss with white embossing powder.              blend between the shades and black to the bottom of the card.
             Stamp the mountains onto white card and emboss with   Stamp encouraging word sentiments around the background
         3 black embossing powder.  Colour with pink, blue, green and  2 and emboss with white embossing powder.
         red and a paintbrush.
                                                                  Stamp the mountains onto white card and emboss with black
             Die-cut the coloured mountains and some clouds from   3 embossing powder. Leave uncoloured to help the background
         4 white card.                                        stand out.

             Trim the background piece to 11x19cm and attach the   4  Die-cut the mountains and some clouds from white card.
         5 mountains, approx1.5cm from the bottom edge, trim o
         any overhang.
                                                                  Trim the background to 10x18cm and attach the mountains
             Create a card blank measuring 12x20cm from white   5 along the base of the card. Use foam pads for some, and liquid
         6 watercolour card and attached the background to the centre.   glue for others to give dimension.
         Fix the clouds between the sentiments to  nish.

                                                                  Create a card blank from watercolour card measuring 12.5x20cm
                       Where can I buy it?                    6 and attach the background piece just left of centre. Adhere

                                                              clouds between the sentiments to  nish.
                         All supplies available from
                        www.thelittlepapertree.com


                                                                           Making Cards & Papercraft February 2020  55