
Page 59 - Making Cards & Papercraft (February 2020)
P. 59
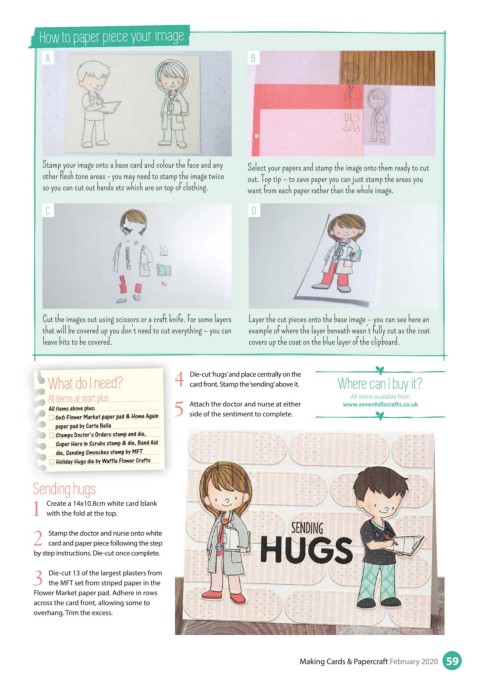
How to paper piece your image
A B
Stamp your image onto a base card and colour the face and any Select your papers and stamp the image onto them ready to cut
other flesh tone areas - you may need to stamp the image twice out. Top tip – to save paper you can just stamp the areas you
so you can cut out hands etc which are on top of clothing. want from each paper rather than the whole image.
C D
Cut the images out using scissors or a craft knife. For some layers Layer the cut pieces onto the base image – you can see here an
that will be covered up you don’t need to cut everything – you can example of where the layer beneath wasn’t fully cut as the coat
leave bits to be covered. covers up the coat on the blue layer of the clipboard.
Die-cut ‘hugs’ and place centrally on the
What do I need? 4 card front. Stamp the ‘sending’ above it. Where can I buy it?
All items at start plus All items available from
All items above plus: Attach the doctor and nurse at either www.sevenhillscrafts.co.uk
6x6 Flower Market paper pad & Home Again 5 side of the sentiment to complete.
paper pad by Carta Bella
Stamps Doctor’s Orders stamp and die,
Super Hero in Scrubs stamp & die, Band Aid
die, Sending Smooches stamp by MFT
Holiday Hugs die by Waffle Flower Crafts
Sending hugs
Create a 14x10.8cm white card blank
1 with the fold at the top.
Stamp the doctor and nurse onto white
2 card and paper piece following the step
by step instructions. Die-cut once complete.
Die-cut 13 of the largest plasters from
3 the MFT set from striped paper in the
Flower Market paper pad. Adhere in rows
across the card front, allowing some to
overhang. Trim the excess.
Making Cards & Papercraft February 2020 59