
Page 16 - ClayCraft - Issue 35 (January 2020)
P. 16
PROJECT
SKILL SCHOOL
ONE
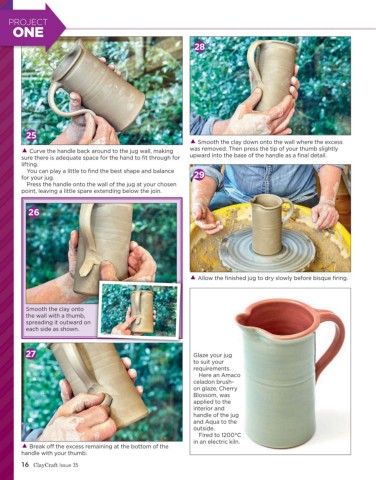
28
25
Smooth the clay down onto the wall where the excess
was removed. Then press the tip of your thumb slightly
Curve the handle back around to the jug wall, making
sure there is adequate space for the hand to fit through for upward into the base of the handle as a final detail.
lifting.
You can play a little to find the best shape and balance
for your jug. 29
Press the handle onto the wall of the jug at your chosen
point, leaving a little spare extending below the join.
26
Allow the fi nished jug to dry slowly before bisque fi ring.
Smooth the clay onto
the wall with a thumb,
spreading it outward on
each side as shown.
27 Glaze your jug
to suit your
requirements.
Here an Amaco
celadon brush-
on glaze, Cherry
Blossom, was
applied to the
interior and
handle of the jug
and Aqua to the
outside.
Fired to 1200°C
in an electric kiln.
Break o the excess remaining at the bottom of the
handle with your thumb.
16 ClayCraft Issue 35