
Page 131 - The City and Guilds Textbook: Plumbing Book 1 for the Level 3 Apprenticeship (9189), Level 2 Technical Certificate (8202) and Level 2 Diploma (6035)
P. 131
Chapter 2 Common processes and techniques
● Let the customer know when any of the services, i.e. water, gas or electricity,
or appliances such as the WC, are going to be turned off or taken out of INDUSTRY TIP
service, and ensure that they have collected enough water for the period of If you are going to be working
temporary decommission; or, if working on a central heating system, ensure outside, politely ask the
they have access to other forms of heat, especially during cold weather. customer to move their car
before you begin work so that
VALUES AND BEHAVIOURS it does not get damaged.
● Cover with dust sheets
Early-morning arrivals are not always welcome. all furniture, carpets and
fixtures that cannot be
It is good practice to keep customers informed of any inconveniences that removed in the area where
could be caused by the work that may affect their day-to-day routine.
you are going to work.
● Before work begins, agree
with the customer the
IMPROVE YOUR ENGLISH position of radiators,
Clear and open communication with your customer will always be appreciated. boilers and all visible
Make sure you explain to them any unforeseen problems that arise, and allow pipework. When fitting
them to discuss possible solutions so they feel well informed about any changes sanitary ware, make
that may incur extra costs or impact the schedule. sure you are fitting the
appliances in the position
that the customer wants.
Preparation of the work area: lifting ● Keep the customer
floorboards, notching and drilling joists, informed about any
problems that arise that
and chasing walls may need them to make a
Much of the work in occupied and existing dwellings involves installing pipework decision.
under floors, in walls and through walls. In this part of the chapter, we will look
at the procedure for lifting floorboards, notching and drilling joists, and chasing
walls to allow the installation of pipework.
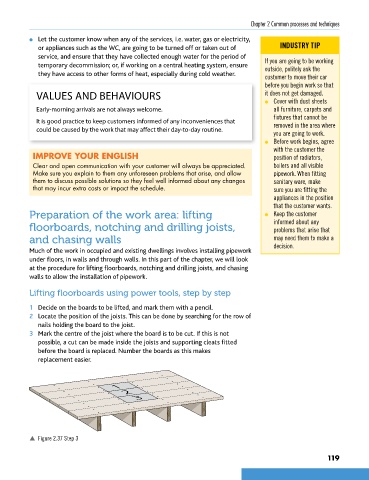
Lifting floorboards using power tools, step by step
1 Decide on the boards to be lifted, and mark them with a pencil.
2 Locate the position of the joists. This can be done by searching for the row of
nails holding the board to the joist.
3 Mark the centre of the joist where the board is to be cut. If this is not
possible, a cut can be made inside the joists and supporting cleats fitted
before the board is replaced. Number the boards as this makes
replacement easier.
1
2
3
p Figure 2.37 Step 3
119
9781510416482.indb 119 29/03/19 8:54 PM