
Page 132 - The City and Guilds Textbook: Plumbing Book 1 for the Level 3 Apprenticeship (9189), Level 2 Technical Certificate (8202) and Level 2 Diploma (6035)
P. 132
The City & Guilds Textbook: Plumbing Book 1
4 Using a nail punch, punch the floorboard nails below the surface of the board.
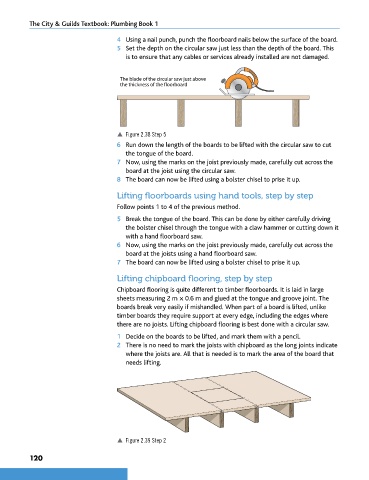
5 Set the depth on the circular saw just less than the depth of the board. This
is to ensure that any cables or services already installed are not damaged.
The blade of the circular saw just above
the thickness of the floorboard
p Figure 2.38 Step 5
6 Run down the length of the boards to be lifted with the circular saw to cut
the tongue of the board.
7 Now, using the marks on the joist previously made, carefully cut across the
board at the joist using the circular saw.
8 The board can now be lifted using a bolster chisel to prise it up.
Lifting floorboards using hand tools, step by step
Follow points 1 to 4 of the previous method.
5 Break the tongue of the board. This can be done by either carefully driving
the bolster chisel through the tongue with a claw hammer or cutting down it
with a hand floorboard saw.
6 Now, using the marks on the joist previously made, carefully cut across the
board at the joists using a hand floorboard saw.
7 The board can now be lifted using a bolster chisel to prise it up.
Lifting chipboard flooring, step by step
Chipboard flooring is quite different to timber floorboards. It is laid in large
sheets measuring 2 m × 0.6 m and glued at the tongue and groove joint. The
boards break very easily if mishandled. When part of a board is lifted, unlike
timber boards they require support at every edge, including the edges where
there are no joists. Lifting chipboard flooring is best done with a circular saw.
1 Decide on the boards to be lifted, and mark them with a pencil.
2 There is no need to mark the joists with chipboard as the long joints indicate
where the joists are. All that is needed is to mark the area of the board that
needs lifting.
p Figure 2.39 Step 2
120
9781510416482.indb 120 29/03/19 8:54 PM