
Page 613 - The City and Guilds Textbook: Plumbing Book 1 for the Level 3 Apprenticeship (9189), Level 2 Technical Certificate (8202) and Level 2 Diploma (6035)
P. 613
Chapter 9 Sanitation systems
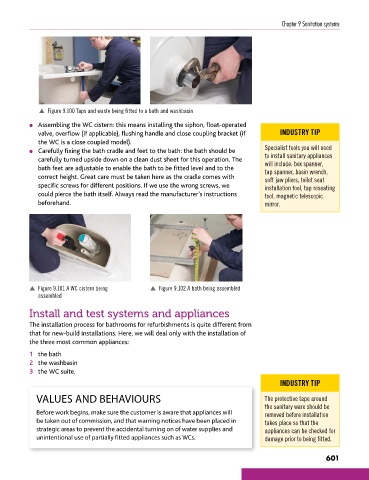
p Figure 9.100 Taps and waste being fitted to a bath and washbasin
● Assembling the WC cistern: this means installing the siphon, float-operated
valve, overflow (if applicable), flushing handle and close coupling bracket (if INDUSTRY TIP
the WC is a close coupled model).
● Carefully fixing the bath cradle and feet to the bath: the bath should be Specialist tools you will need
carefully turned upside down on a clean dust sheet for this operation. The to install sanitary appliances
will include: box spanner,
bath feet are adjustable to enable the bath to be fitted level and to the tap spanner, basin wrench,
correct height. Great care must be taken here as the cradle comes with soft jaw pliers, toilet seat
specific screws for different positions. If we use the wrong screws, we installation tool, tap reseating
could pierce the bath itself. Always read the manufacturer’s instructions tool, magnetic telescopic
beforehand. mirror.
p Figure 9.101 A WC cistern being p Figure 9.102 A bath being assembled
assembled
Install and test systems and appliances
The installation process for bathrooms for refurbishments is quite different from
that for new-build installations. Here, we will deal only with the installation of
the three most common appliances:
1 the bath
2 the washbasin
3 the WC suite.
INDUSTRY TIP
VALUES AND BEHAVIOURS The protective tape around
the sanitary ware should be
Before work begins, make sure the customer is aware that appliances will removed before installation
be taken out of commission, and that warning notices have been placed in takes place so that the
strategic areas to prevent the accidental turning on of water supplies and appliances can be checked for
unintentional use of partially fitted appliances such as WCs. damage prior to being fitted.
601
9781510416482.indb 601 29/03/19 9:08 PM