
Page 615 - The City and Guilds Textbook: Plumbing Book 1 for the Level 3 Apprenticeship (9189), Level 2 Technical Certificate (8202) and Level 2 Diploma (6035)
P. 615
Chapter 9 Sanitation systems
2 Place the pedestal into position and gently lower the washbasin, complete
with the waste trap fitted, onto the pedestal, ensuring that the centre
lines match. Do not use any silicone on the pedestal face at this time. It is
important first to ensure that the washbasin’s position is correct, that the
basin and pedestal match properly, and that the basin is level. Place a level
on the top of the washbasin and, once the appliance has been adjusted
level, mark the fixing holes underneath the basin and also mark around the
pedestal at floor level. This will ensure that both pedestal and basin go back
into the same position once the wall has been drilled.
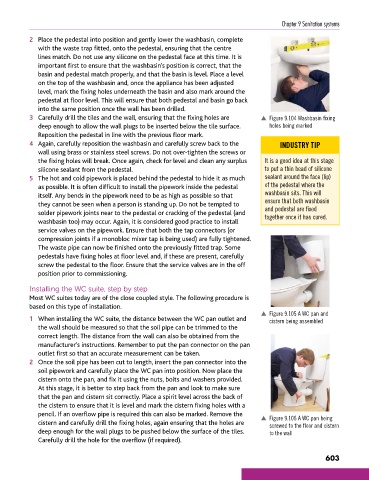
3 Carefully drill the tiles and the wall, ensuring that the fixing holes are p Figure 9.104 Washbasin fixing
deep enough to allow the wall plugs to be inserted below the tile surface. holes being marked
Reposition the pedestal in line with the previous floor mark.
4 Again, carefully reposition the washbasin and carefully screw back to the INDUSTRY TIP
wall using brass or stainless steel screws. Do not over-tighten the screws or
the fixing holes will break. Once again, check for level and clean any surplus It is a good idea at this stage
silicone sealant from the pedestal. to put a thin bead of silicone
5 The hot and cold pipework is placed behind the pedestal to hide it as much sealant around the face (lip)
as possible. It is often difficult to install the pipework inside the pedestal of the pedestal where the
itself. Any bends in the pipework need to be as high as possible so that washbasin sits. This will
they cannot be seen when a person is standing up. Do not be tempted to ensure that both washbasin
solder pipework joints near to the pedestal or cracking of the pedestal (and and pedestal are fixed
together once it has cured.
washbasin too) may occur. Again, it is considered good practice to install
service valves on the pipework. Ensure that both the tap connectors (or
compression joints if a monobloc mixer tap is being used) are fully tightened.
The waste pipe can now be finished onto the previously fitted trap. Some
pedestals have fixing holes at floor level and, if these are present, carefully
screw the pedestal to the floor. Ensure that the service valves are in the off
position prior to commissioning.
Installing the WC suite, step by step
Most WC suites today are of the close coupled style. The following procedure is
based on this type of installation.
p Figure 9.105 A WC pan and
1 When installing the WC suite, the distance between the WC pan outlet and cistern being assembled
the wall should be measured so that the soil pipe can be trimmed to the
correct length. The distance from the wall can also be obtained from the
manufacturer’s instructions. Remember to put the pan connector on the pan
outlet first so that an accurate measurement can be taken.
2 Once the soil pipe has been cut to length, insert the pan connector into the
soil pipework and carefully place the WC pan into position. Now place the
cistern onto the pan, and fix it using the nuts, bolts and washers provided.
At this stage, it is better to step back from the pan and look to make sure
that the pan and cistern sit correctly. Place a spirit level across the back of
the cistern to ensure that it is level and mark the cistern fixing holes with a
pencil. If an overflow pipe is required this can also be marked. Remove the p Figure 9.106 A WC pan being
cistern and carefully drill the fixing holes, again ensuring that the holes are screwed to the floor and cistern
deep enough for the wall plugs to be pushed below the surface of the tiles. to the wall
Carefully drill the hole for the overflow (if required).
603
9781510416482.indb 603 29/03/19 9:08 PM