
Page 271 - Learn To Program With Scratch
P. 271
When you are logged in, Scratch automatically saves your work in the
cloud (that is, on the Scratch server), but it’s still a good idea to click Save
before you exit Scratch. The Save as a copy option saves your current project
with a different name. If your current project is named Test, for example, the
new project will be named Test copy. (You can change that name by typing
a new one in the project’s name edit box.) The Revert option discards any
changes you’ve made since you opened the current project.
If you want to save your projects on your computer rather than in the
cloud, use the Download to your computer option. The Upload from your
computer option, on the other hand, allows you to load a Scratch project
from your computer to the Project Editor. You can use this option to upload
projects created with Scratch 1.4 and convert them to the Scratch 2 format.
Remixing a Project
Click the Remix button when you have some ideas to add to another
Scratcher’s project. This will copy the selected project to your account
and give you a starting point for your work.
You can also click View the remix tree on the project’s page (see Fig-
ure A-6) to see how the project has evolved over time and pick the branch
that you’d like to copy from.
If you share your remixed project, the project’s page will list the origi-
nal creator(s) and provide links to their projects.
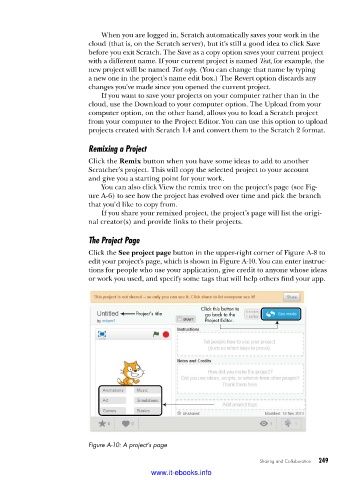
The Project Page
Click the See project page button in the upper-right corner of Figure A-8 to
edit your project’s page, which is shown in Figure A-10. You can enter instruc-
tions for people who use your application, give credit to anyone whose ideas
or work you used, and specify some tags that will help others find your app.
Click this button to
Project’s title go back to the
Project Editor.
Figure A-10: A project’s page
Sharing and Collaboration 249
www.it-ebooks.info