Page 143 - Receptionist
P. 143

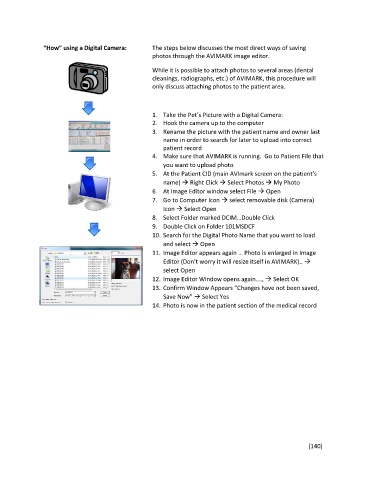
“How” using a Digital Camera:       The steps below discusses the most direct ways of saving
                                                   photos through the AVIMARK image editor.

                                                   While it is possible to attach photos to several areas (dental
                                                   cleanings, radiographs, etc.) of AVIMARK, this procedure will
                                                   only discuss attaching photos to the patient area.


                                                   1.  Take the Pet’s Picture with a Digital Camera:
                                                   2.  Hook the camera up to the computer
                                                   3.  Rename the picture with the patient name and owner last
                                                       name in order to search for later to upload into correct
                                                       patient record
                                                   4.  Make sure that AVIMARK is running.  Go to Patient File that
                                                       you want to upload photo
                                                   5.  At the Patient CID (main AVImark screen on the patient’s
                                                       name)  Right Click  Select Photos  My Photo
                                                   6.  At Image Editor window select File  Open
                                                   7.  Go to Computer Icon  select removable disk (Camera)
                                                       Icon  Select Open
                                                   8.  Select Folder marked DCIM…Double Click
                                                   9.  Double Click on Folder 101MSDCF
                                                   10. Search for the Digital Photo Name that you want to load
                                                       and select  Open
                                                   11. Image Editor appears again … Photo is enlarged in Image
                                                       Editor (Don’t worry it will resize itself in AVIMARK).. 
                                                       select Open
                                                   12. Image Editor Window opens again….,  Select OK
                                                   13. Confirm Window Appears “Changes have not been saved,
                                                       Save Now”  Select Yes
                                                   14. Photo is now in the patient section of the medical record


                                                                                                       [140]
   138   139   140   141   142   143   144   145   146   147   148