
Page 72 - ClayCraft - Issue 35 (January 2020)
P. 72
SKILL SCHOOL
SKILL SCHOOL
PROJECT
FIVE
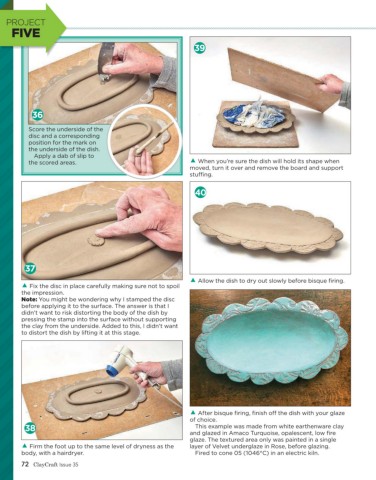
39
36
Score the underside of the
disc and a corresponding
position for the mark on
the underside of the dish.
Apply a dab of slip to
the scored areas. When you’re sure the dish will hold its shape when
moved, turn it over and remove the board and support
stu ng.
40
37
Allow the dish to dry out slowly before bisque fi ring.
Fix the disc in place carefully making sure not to spoil
the impression.
Note: You might be wondering why I stamped the disc
before applying it to the surface. The answer is that I
didn’t want to risk distorting the body of the dish by
pressing the stamp into the surface without supporting
the clay from the underside. Added to this, I didn’t want
to distort the dish by lifting it at this stage.
After bisque fi ring, fi nish o the dish with your glaze
of choice.
38 This example was made from white earthenware clay
and glazed in Amaco Turquoise, opalescent, low fire
glaze. The textured area only was painted in a single
Firm the foot up to the same level of dryness as the layer of Velvet underglaze in Rose, before glazing.
body, with a hairdryer. Fired to cone 05 (1046°C) in an electric kiln.
72 ClayCraft Issue 35