
Page 68 - ClayCraft - Issue 35 (January 2020)
P. 68
SKILL SCHOOL
SKILL SCHOOL
PROJECT
FIVE
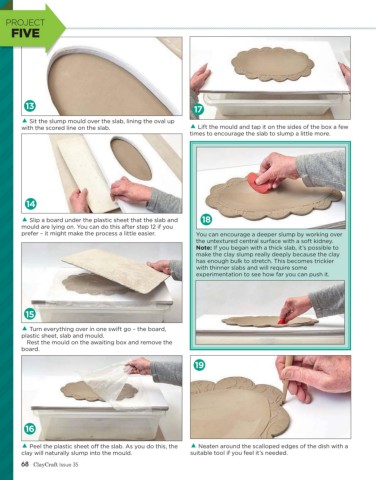
13
17
Sit the slump mould over the slab, lining the oval up
with the scored line on the slab. Lift the mould and tap it on the sides of the box a few
times to encourage the slab to slump a little more.
14
Slip a board under the plastic sheet that the slab and 18
mould are lying on. You can do this after step 12 if you
prefer – it might make the process a little easier. You can encourage a deeper slump by working over
the untextured central surface with a soft kidney.
Note: If you began with a thick slab, it’s possible to
make the clay slump really deeply because the clay
has enough bulk to stretch. This becomes trickier
with thinner slabs and will require some
experimentation to see how far you can push it.
15
Turn everything over in one swift go – the board,
plastic sheet, slab and mould.
Rest the mould on the awaiting box and remove the
board.
19
16
Peel the plastic sheet o the slab. As you do this, the Neaten around the scalloped edges of the dish with a
clay will naturally slump into the mould. suitable tool if you feel it’s needed.
68 ClayCraft Issue 35