
Page 173 - Robot Design Handbook ROBOCON Malaysia 2019
P. 173
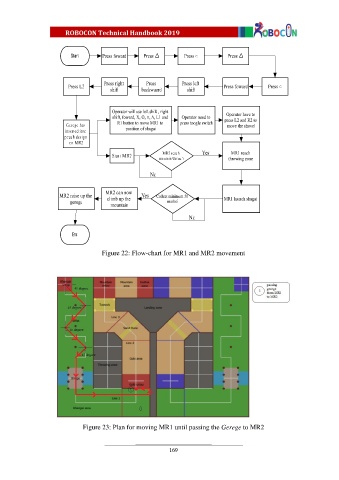
Figure 22: Flow-chart for MR1 and MR2 movement


                              Figure 23: Plan for moving MR1 until passing the Gerege to MR2


                                                            169