
Page 28 - Learn To Program With Scratch
P. 28
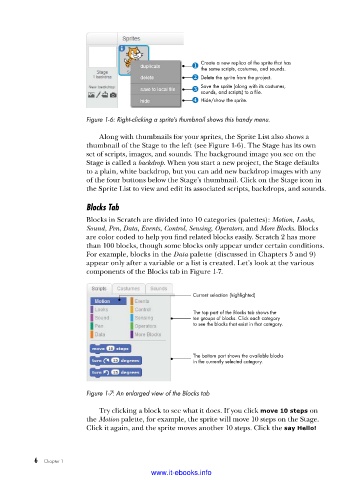
Create a new replica of the sprite that has
the same scripts, costumes, and sounds.
Delete the sprite from the project.
Save the sprite (along with its costumes,
sounds, and scripts) to a file.
Hide/show the sprite.
Figure 1-6: Right-clicking a sprite’s thumbnail shows this handy menu .
Along with thumbnails for your sprites, the Sprite List also shows a
thumbnail of the Stage to the left (see Figure 1-6). The Stage has its own
set of scripts, images, and sounds. The background image you see on the
Stage is called a backdrop. When you start a new project, the Stage defaults
to a plain, white backdrop, but you can add new backdrop images with any
of the four buttons below the Stage’s thumbnail. Click on the Stage icon in
the Sprite List to view and edit its associated scripts, backdrops, and sounds.
Blocks Tab
Blocks in Scratch are divided into 10 categories (palettes): Motion, Looks,
Sound, Pen, Data, Events, Control, Sensing, Operators, and More Blocks. Blocks
are color coded to help you find related blocks easily. Scratch 2 has more
than 100 blocks, though some blocks only appear under certain conditions.
For example, blocks in the Data palette (discussed in Chapters 5 and 9)
appear only after a variable or a list is created. Let’s look at the various
components of the Blocks tab in Figure 1-7.
Current selection (highlighted)
The top part of the Blocks tab shows the
ten groups of blocks. Click each category
.
to see the blocks that exist in that category.
The bottom part shows the available blocks
in the currently selected category.
Figure 1-7: An enlarged view of the Blocks tab
Try clicking a block to see what it does. If you click move 10 steps on
the Motion palette, for example, the sprite will move 10 steps on the Stage.
Click it again, and the sprite moves another 10 steps. Click the say Hello!
6 Chapter 1
www.it-ebooks.info